Below the beading cards are tucked among the beads to be used for beading. Choosing beads can often be the most enjoyable and the most frustrating part of the beading process. Heidi selected satin beads which reinforces the elegance of the velveteen and art paper.
Buffalo Days
Wednesday, March 16, 2016
Preparing to make Beaded Appliques
Below the beading cards are tucked among the beads to be used for beading. Choosing beads can often be the most enjoyable and the most frustrating part of the beading process. Heidi selected satin beads which reinforces the elegance of the velveteen and art paper.
Reconstruction - Interior Box of Purse
The acetate pattern of the interior bottom was traced onto the beautiful art paper. When the piece was cut out it was trimmed just inside the pencil line. Two bottoms were traced and cut.
The pattern was then pressed inside the box. Using a thumb nail or bone folder the edge was crisply pressed into the creases.
Strips were measured on the back side of the paper for the interior and exterior sides of the purse body. The strips were twice the width of the side of the box.
Here all the paper pieces are ready to be attached to the body using Modge Podge.

A clean craft paper surface was laid out for the job gluing.
The adhesive is applied heavily to the box, then the paper is attached. The wide end of the body indicates the bottom of the purse; here you can see that a smaller joiner piece will be applied over the large piece.
Deconstructing cont.
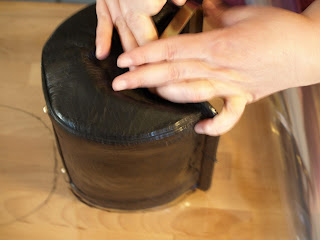
The original embossed paper covering (which resembled some imaginary animal skin) was scraped off the interior wood case of the purse. Rough spots were sanded to provide a smooth surface for priming with gesso.
Wednesday, February 10, 2016
Selecting Materials
Heidi looked through my collection of fabrics and decided on a neutral green velveteen for the purse's foundation fabric.
She is going to create pockets for the interior of the box with a lining fabric.
The edges of the balsa wood purse body will be covered with decorative art paper. This required a trip to USArtQuest in Chelsea Michigan, which has a large stock of beautiful art papers.
Heidi selected a green paper with concentric circles printed on it. The circles reminded her of the song of the cicadas. Because of the paper selection the color of the lining changed to a golden satin similar in color to some of the concentric circles.
Heidi's idea is to bead the cicadas in vibrant colors which will contrast against the neutral green velveteen. She will be employing the technique of beaded applique.
Pattern Making
I will be beading a cover for a doctors bag. Generally speaking, these types of bags do not need to be deconstructed in order to create a pattern.
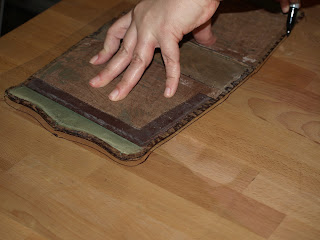
Acetate is used to create a traced pattern of the bag. Begin by taping the acetate to the handle. Keeping the acetate firmly in place begin tracing over the seam lines.
Make a tracing of each end of the bag. There is a left and right end, and a front and rear side determined by the the degree of the angle of the opening.
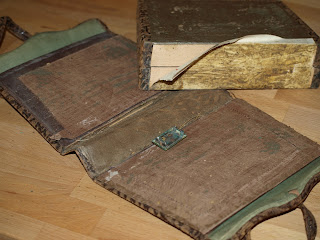
Heidi's bag was deconstructed in order to create a pattern.
The Purse tells a Story
Each hand bag has a narrative whether the design is non-objective (geometric), abstract, or representational. Factors influencing a bag's narrative include materials and the artist's personal interests. If you don't have an inspiration board now is the time to start making one. Begin by collecting images or by writing lists of things that interest you.
Heidi has chosen the life cycle of the cicada as the main design element. The narrative of her purse with be shedding old skin, rebirth, and reaching the height of one's potential.
She collected images of cicadas off the internet to inform her design.
Inspired by this postcard, I have decided to bead the image of a rabbit on to this bag.
Friday, January 29, 2016
Beaded Bag Tutorial
Over the next few weeks I will be blogging a tutorial on how to bead a handbag. My friend and assistant Heidi will be constructing her own bag.
Not all the techniques I use will be demonstrated in this tutorial, but the techniques shared will be a good reference for starting your own bag. Eventually you will develop methods that comfortably allow you to achieve your design goals.
Not all the techniques I use will be demonstrated in this tutorial, but the techniques shared will be a good reference for starting your own bag. Eventually you will develop methods that comfortably allow you to achieve your design goals.
Step 1:
Choose a Bag
Bags suitable for beading can be found on etsy, eBay, at the local thrift store, or in grandma's closet. You may want to get more than one if you don't have a definite design in mind. Sometimes the shape of the bag helps to determine the design.
Generally it is good to choose a hard sided bag which will help to support the weight of the beaded work.
Size is always a consideration. It's good to have an idea of what you might be carrying in the bag. Generally smaller bags are better, although they can be more costly. Heidi wanted to be sure her bag was able to accommodate her phone.
When constructing a purse ask yourself: Where, when, and how are you going to use this bag? What impression to you want the bag to make. Will it tell a story?
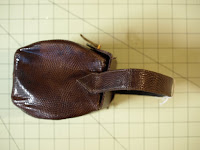
Here are three possibilities. Although the shape of the red purse is very cute it barely holds a phone.
It's time to ask yourself the suggested questions and think about a design element.
Subscribe to:
Posts (Atom)


